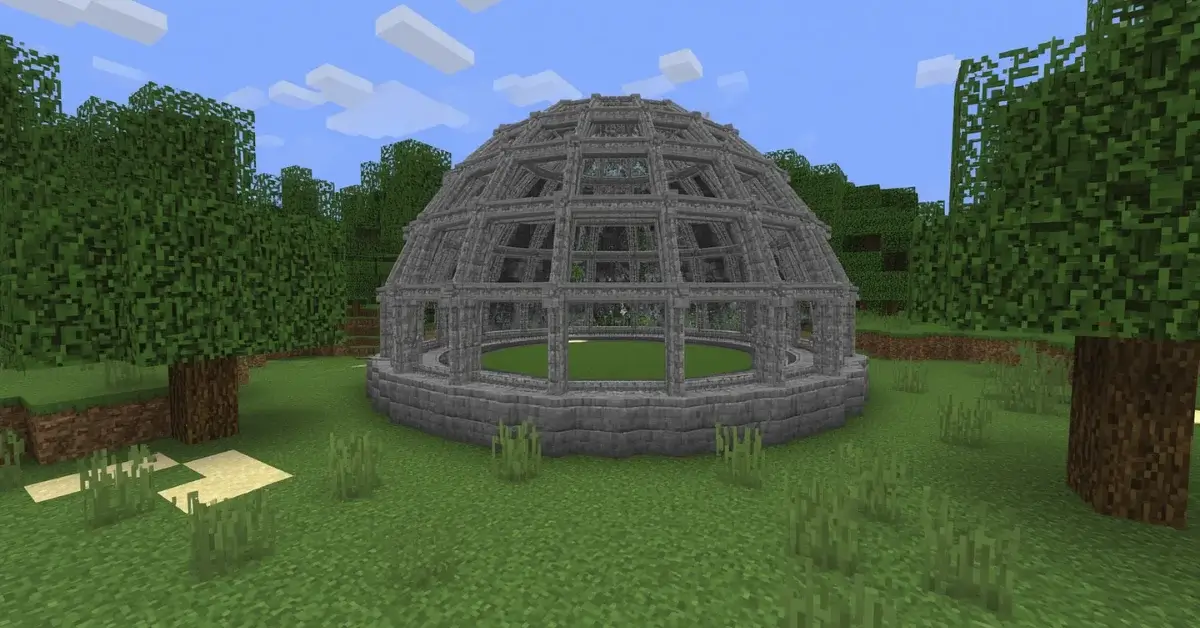
Minecraft Dome Tutorial — How to Build the Perfect Dome
A dome is just half a sphere, which sounds like it should be half the effort — and mostly it is. Here’s the full method, from picking a base size to closing the roof cleanly at the peak.
Domes are one of the most rewarding shapes to add to a Minecraft build because they instantly signal intention — a flat roof reads as “unfinished,” while a dome reads as “designed.” They’re also more approachable than they look. A dome is the top half of a sphere: the same shrinking-circle layer pattern, just starting from the widest ring and building upward instead of building both directions from a middle point. That means you do roughly half the layer-planning work a full sphere needs, with no bottom half to keep symmetrical against.
Start with the base, and don’t rush it
The base ring is the widest circle in the whole dome, and it’s the one every layer above it depends on for size and alignment. Lay it out the same way you’d lay out any circle — center point, four extreme points, then the curve, mirrored quadrant by quadrant — and check it from directly above before adding any height. A base that’s slightly off-center is the single most common reason a finished dome looks subtly wrong even though no individual layer seems to have an error.
If the dome is sitting on top of an existing circular tower or room, match the base ring to that structure’s outer wall exactly, not approximately. Even a one-block mismatch becomes visually obvious once the dome curves inward above it.
Building upward, one shrinking layer at a time
Above the base, each layer is a smaller circle than the one below it, and — just like a sphere — the shrinking isn’t linear. The first several layers above the base shrink slowly, so a 21-block base might still be a 19 or 17-block circle just a couple of layers up. Near the peak, layers shrink fast, sometimes dropping several blocks in radius from one layer to the next before closing at a single block. Knowing this in advance means the fast shrinking near the top reads as a natural curve rather than looking like a mistake.
Get every layer’s exact blueprint automatically — enter a base diameter and step from base to peak with a live block count.
Open the Dome GeneratorShell vs. filled — and why shell wins most of the time
A shell (hollow) dome only places blocks on the curved surface, leaving the interior open — the standard choice for roofs, since you want the space underneath usable for a room, an observation deck, or simply open sky through a glass dome. A filled dome places blocks all the way through, which is mostly useful only for small decorative caps where the interior doesn’t matter and the material cost stays low. On anything larger than a small accent piece, filled domes get expensive fast and remove interior space you’d otherwise use.
A note on structural realism
Real-world domes rely on compression forces to hold their shape without a solid fill, and while Minecraft doesn’t simulate physics that way, building shell domes still mirrors how actual architecture handles large roofs — a thin curved shell rather than solid stone. It’s a small detail, but it’s part of why shell domes tend to look more convincing than filled ones, beyond just the material savings.
Keeping the peak from looking jagged
The final few layers before a dome closes are the smallest circles in the entire shape, which means any misalignment is the most visible right where the eye is naturally drawn — at the very top. Two things prevent a jagged-looking peak: keeping every layer centered on the exact same point as the base ring (not eyeballing it fresh at each new layer), and resisting the urge to “smooth out” a small top layer by adding extra blocks that aren’t part of the actual circle math — that usually makes the peak look more uneven, not less.
Roof styling ideas once the shape is right
- Ribbed domes: run contrasting-block “ribs” from base to peak along a few evenly-spaced meridian lines, echoing real-world domed architecture like observatories and cathedrals.
- Glass domes: swap the outer shell to glass or stained glass for a greenhouse or observatory feel, especially effective over a garden or a night-sky viewing room.
- Layered material bands: change block type every few layers going up the dome, from a heavier stone base to a lighter material near the peak, to add visual texture without breaking the shape.
- Oculus domes: stop the top one or two layers short and leave an open circular skylight at the peak instead of closing it completely — a classic Pantheon-style touch.
Sizing your dome to its base
A dome’s base diameter should generally match — or slightly exceed — the diameter of whatever it’s sitting on top of, so the transition from wall to roof doesn’t step inward abruptly. For a small gazebo or tower room, an 11–15 block base gives a proportionate roof without much interior headroom underneath. For a main hall, greenhouse, or observatory, 21–31 blocks gives real usable space beneath the curve. Anything beyond 41 blocks starts to need scaffolding support during construction and benefits from downloading a layer-by-layer PNG reference to track progress against, since counting rows purely by eye gets error-prone at that scale.
Mistakes that turn a good dome into a lopsided one
- Re-eyeballing the center on every layer instead of building straight up from the base’s fixed center point — the most common cause of a peak that drifts to one side.
- Skipping the “check from above” step on the base ring. A base that looks fine from the side can still be off-center, and that error only gets harder to see (and fix) once several layers are stacked on top of it.
- Choosing filled mode on a large dome without checking the block total first — the material and time cost climbs fast, and most of that fill is never seen once the roof is closed.
- Adding “smoothing” blocks near the peak that aren’t part of the actual layer pattern, trying to fix a jagged top by hand instead of re-checking alignment against the base.
Frequently asked questions
Is a dome easier to build than a full sphere? +
Yes. A dome only needs the top half of a sphere’s layers, and the base ring gives you a single fixed reference point to build everything else against, instead of a middle layer with two directions to keep symmetrical.
What’s the smallest base size that still looks like a dome? +
Below roughly 9–11 blocks, a dome’s layers shrink so quickly there’s barely room for a curve to read at all, and the shape tends to look more like a stepped pyramid. 11–15 blocks is a practical minimum for a base that still reads as genuinely domed.
Can I build a dome on an oval or rectangular base? +
The layer-shrinking math in this guide assumes a circular base. An oval or rectangular footprint can still be domed, but the layers won’t shrink at a uniform rate in every direction, so it has to be tapered by eye using a circular dome’s layer pattern as a rough reference rather than an exact one.
Do I need scaffolding to build a large dome? +
Past roughly 25–30 blocks in base diameter, reaching the upper layers accurately without a stable platform gets difficult, and flying freely makes it easy to lose track of which layer you’re on. Temporary scaffolding you remove afterward keeps every layer aligned to the same reference point.