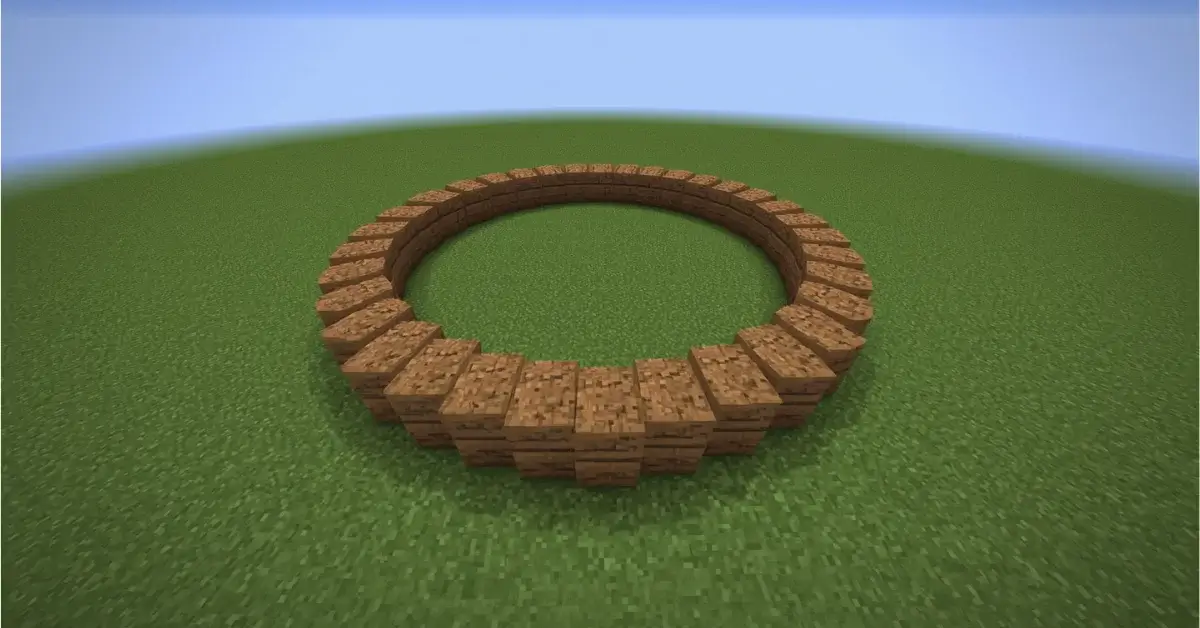
How to Build a Circle in Minecraft
Minecraft doesn’t have curves — every block is a straight-edged cube. A circle you build in it is really a pattern that tricks the eye into seeing round. Here’s how to lay that pattern out correctly the first time, by hand, without it turning into an octagon or a lopsided blob.
Ask ten Minecraft builders how to make a circle and most of them will describe the same failure first: they start placing blocks from one side, eyeball the curve as they go, and end up with something closer to a dented hexagon. It’s not a lack of skill. A circle is the one shape in Minecraft that actively fights the game’s grid, and building it by feel almost never works, even for experienced players. The fix isn’t talent — it’s order. Get the sequence right and a circle of almost any size comes out clean on the first attempt.
A Minecraft circle is an approximation, and that’s fine
A real circle has no straight lines anywhere on its edge. A Minecraft block is nothing but straight lines. Those two facts don’t fully reconcile — what you’re actually building is a ring of blocks positioned so that, from a normal viewing distance, the small stair-steps along the edge disappear into what the eye reads as a curve. This is true of every circle anyone has ever built in the game, from a small garden well to a stadium roof. Once that clicks, a lot of the anxiety about getting it “perfect” goes away — the goal is a shape that reads as round, not one that’s mathematically flawless, because the second one doesn’t exist on a square grid.
Pick your diameter based on what the circle is for
Diameter is the width of the circle straight through its center, measured in blocks, and it’s the only number you need to decide before you start. Bigger isn’t automatically better — a well doesn’t need forty blocks any more than a coliseum floor works at nine. Use the size that matches the job:
| Diameter | Works well for |
|---|---|
| 5–7 | Wells, small pillars, plant pots, decorative accents |
| 9–15 | Tower floors, fountains, gazebo bases, small ponds |
| 17–25 | Arena floors, courtyard centerpieces, mid-size towers |
| 30+ | Coliseums, stadium fields, race tracks, sphere and dome bases |
If the circle needs to look genuinely smooth rather than blocky, stay above roughly 15 blocks — under that, the shape starts reading as an octagon or diamond no matter how carefully it’s placed, simply because there aren’t enough rows to round it off.
Mark the center before you place a single outer block
Every mistake in a freehand circle traces back to the same root cause: no fixed reference point. Before anything else, decide where the center of the circle sits and mark it — a torch, a different-colored block, anything visible from above works.
This is also where diameter parity matters. An odd diameter (9, 15, 21…) has one exact center block, which most builders find the most intuitive to build against. An even diameter (10, 16, 22…) has no single center block — instead there’s a 2×2 area in the middle, and the circle is built symmetrically around that block of four rather than around one point. Neither is wrong, but knowing which one you’re working with before you start prevents the whole shape from drifting half a block off-center by the time you reach the edge.
Build one quarter, then mirror it three times
This is the actual technique, and it’s simpler than most explanations make it sound. A circle is symmetrical across both its vertical and horizontal axis, which means you only ever have to work out one quarter of it by hand — the other three are exact mirror copies.
- Place your four extreme points first. From the center, count out the radius (half the diameter) in each of the four cardinal directions — north, south, east, west — and place a block at each. These four points pin the entire circle in place before anything else goes down.
- Fill in one quarter between two adjacent extreme points. Work row by row, moving one block at a time from the outer edge inward, adjusting the row’s width based on how far it is from the extreme point. Go slow here — this quarter is the template for the whole shape.
- Mirror that same pattern into the other three quadrants. Copy the block positions from your finished quarter and reflect them across the center, both left-right and top-bottom. If a block sits three right and two up from center in your built quadrant, its mirror sits three left and two up, three right and two down, and three left and two down.
Building this way means any small judgment call you make only has to be made once, in one quadrant, and it’s then applied identically everywhere else — which is exactly why mirrored circles come out symmetrical and freehand ones don’t.
Skip the row-by-row counting entirely — enter a diameter and get the full block pattern instantly, with a live block count and PNG download.
Open the Circle GeneratorOutline or filled — decide before you count blocks
An outline circle is just the ring — hollow in the middle, which is what you want for a tower base, a wall, or anything with a floor or interior of its own. A filled circle solidly covers every block inside the ring too, which suits a floor, a platform, or a farm bed. The two use very different amounts of material at the same diameter, and filled always costs more, so it’s worth deciding which one you actually need before gathering an entire inventory of blocks.
Mistakes that show up almost every time
- Placing blocks freehand along the curve instead of counting from the center — this is the single biggest cause of lopsided circles, and it’s avoidable entirely by using the quadrant method above.
- Skipping the center mark. Without a fixed reference, small errors compound row by row and only become obvious once the circle is nearly finished — by which point fixing it means tearing out several rows.
- Not accounting for odd vs. even diameter before starting, which leads to a circle that’s technically symmetrical but not centered where you meant it to be.
- Expecting small circles to look smooth. A 7-block circle reading as an octagon isn’t a building error — it’s a resolution limit every pixel circle has, vanilla or generated.
When it’s worth using a generator instead of counting by hand
The quadrant method works at any size, but the amount of manual counting grows fast — a 41-block circle has ten times more rows to track than a 9-block one, and a single miscount early on throws off everything after it. A circle generator runs the same underlying geometry and hands you the finished pattern, row by row, so there’s nothing left to calculate mid-build. It’s not a different method from the one above; it’s the same method with the counting already done, which is mainly a time-saver on anything past the small-and-simple range.
Circles as the starting point for bigger shapes
A single circle is rarely the end goal on its own — it’s usually the cross-section a bigger build is made from. Stack the same circle straight upward and it becomes a cylinder or a tower. Shrink and stack a series of circles by size and it becomes a sphere. Take just the top half of that same sphere and it becomes a dome roof. Every one of those shapes starts from exactly the skill covered here: placing one clean, correctly centered circle.
Frequently asked questions
Why can’t Minecraft make a true circle? +
Every block is a fixed 1×1 cube on a grid, and a true circle is a smooth curve with no straight edges. What builders call a circle is a close approximation — blocks placed so the outline reads as round from a normal viewing distance, even though up close it’s a stack of small straight steps.
What’s the smallest circle you can build in Minecraft? +
A 3-block circle is really just a plus-shaped cluster, and it takes until roughly 7–9 blocks before the shape reliably reads as round instead of a diamond or octagon. Below that, it still works fine as a small accent — just don’t expect it to look curved.
Do I need WorldEdit to build a circle? +
No. WorldEdit and similar mods place a circle instantly with one command, which helps on very large builds or for server admins working at scale, but a circle of any size can be built entirely by hand once you know its block pattern.
How do I build a circle taller than one block, like a cylinder? +
Build the circle once at the base, then repeat the exact same pattern straight upward for as many rows as you want it tall. As long as every row lines up with the one below it, the result reads as a clean cylinder rather than a tapered shape.
4 thoughts on “How to Build a Circle in Minecraft”